
Staying organized. It’s a no-brainer.
So without further ado, let’s jump right in with 5 tips on how to keep your survey data nice, clean and organized for whatever business you might be in.
Using a nickname for your survey means that you can have a different internal name that’s shown externally to your respondents. Think of it as public-facing vs. private-facing.
This is super helpful if say you have two surveys for different people and you want respondents to see the same title. But, you also want to be able to tell the difference between surveys from within your account.
The nickname will show on your My Surveys page while the title of the survey will show on the design of the survey for your respondents. To add a nickname, go to the Survey Design tab for your survey and click Edit on the title. Then, check the small box in the upper right corner, Use a Nickname. A space will then appear that will allow you to add a different nickname than the survey title.

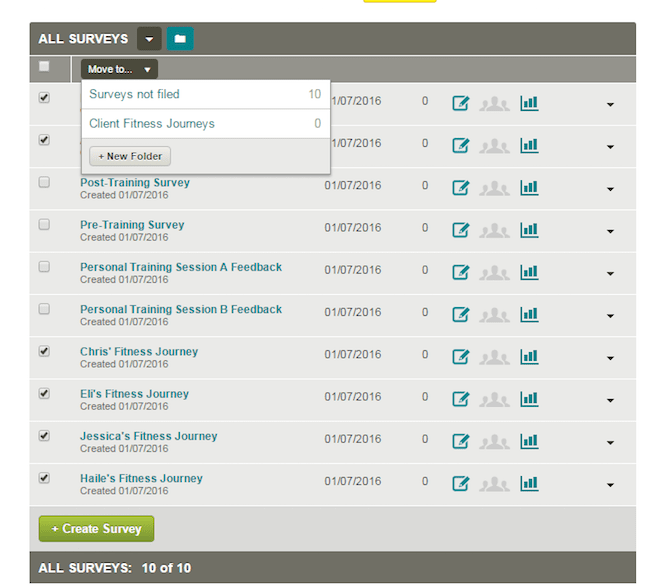
You can create folders on the My Surveys page to organize your surveys by client, date, topic etc. Then, your default view will still be all surveys but you can also view the individual folders to just see the surveys that you’ve organized into each folder. This allows you to quickly access all surveys pertaining to a certain topic in your account.
To organize your surveys into folders, go to the My Surveys page in your account and click the folder icon located at the top of your list of surveys. You’ll then see the option to create folders and organize into folders already created.
You can share the design of a survey that you made with your colleagues as long as they have a paid account. That will allow them to receive the copy.
When you copy the design of a survey to another paid account, the survey remains in your account. But we duplicate a copied version right into your colleagues’ account that they can edit and distribute.
To send a copy, go to your My Surveys page click the down arrow located to the right of each survey. You can then choose to Send a copy.

4. Transfer data into colleague’s accounts
Let’s say one of your colleagues leaves the company or is on vacation. During their leave of absence, you have taken over their client base. In order to be sure and maintain the client’s data, you need to transfer the client’s surveys and data into your paid SurveyMonkey account so you can continue to help them on their journey.
The way to go about this is much the same as copying the design of the survey to another account. But when you transfer, the survey, data and collectors will instead be removed from the account it’s currently in over to the selected paid account.
To transfer, go to your My Surveys page and click the down arrow to the right of the survey you’d like to transfer. Then, choose to transfer the survey. After that, you’ll enter the username of the destination account and then click Complete Transfer.
When you have multiple collectors for a survey, it helps to label them clearly. Then, once you get responses, if you want to filter your data by collector to just view a subset of data based on which collector that data was submitted with, you’ll be able to do that.
To rename a Collector, go to the Collect Responses tab of your survey and click the down arrow located to the right of the Collector. Then, go ahead and rename.


So good luck and have fun out there keeping your business data organized!
Questions for Jewell? Let her know below!