How to embed your survey on a website
Where’s the best place to share a survey? Well, here at SurveyMonkey, we think pretty much anywhere. It’s a cinch to take a web link (a collector that’s automatically generated and easily shared) and post it pretty much anywhere. But sometimes it’s a better experience for survey-takers to see the survey on an available webpage rather than having to click open a new window, especially if it is a website feedback survey.
In this step-by-step instruction, we’ll show you how to use our trusty website embed option, which is another type of collector. Have your survey ready to go? Let’s do it!
- After you’ve created your survey, click the green “Send Survey” button.
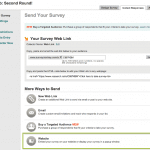
- Next, you’ll be directed to the Send Your Survey page featured in the image below. Select the “Website” option. If you’d like, you can also rename this collector.

- On the Survey Configuration page, select the “Embed” website survey type. You’ll notice this is also where you can try two other website survey collectors: “Invitation Popup” and “Survey Popup.” Also, on this same page, you can adjust the survey’s display options by adjusting width and height, showing a border, or hiding the survey once its completed.
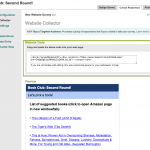
- When you’ve decided on your survey’s display options, click “Save”, which will direct you to the actual embed code. Just below the code, you’ll see a preview of how your embedded survey will look on your website.
- And now, for the best part! Simply copy and paste the code into your web page. If you aren’t familiar with editing HTML, ask an IT professional, webmaster, or whomever has been designing your site for help.

And for one final tip, if you’d like an additional preview of how your survey will look on your website, try copying it into an HTML test bed.